How to knit an i-cord topper on the crown of the Starboard baby hat.
This tutorial shows the i-cord top on the Starboard Hat, a pattern available here. But this tutorial could work for any pattern you’re following that asks you to knit an i-cord on top as a finishing touch, such as the Dorrance Street Hat.
What is an i-cord?
An i-cord is a small knitted tube, a knitting invention attributed to Elizabeth Zimmerman. The neat thing about i-cords is that the yarn curls around itself as you knit. This makes your knitting appear to be a rope-like tube that was knit in the round, but you don’t actually knit in the round.
You can generally work an i-cord using between three and five (3-5) stitches. You can knit an i-cord on more than five stitches but you’ll start to see a laddering effect on the back of your work if you have too many stitches to allow the yarn to fully curl in on itself. This isn’t ‘bad’ or ‘wrong’, just something to keep an eye out for.
I-cords are a really useful thing to know how to knit. This tutorial shows you how to knit the i-cord from the crown of a hat, but you can use i-cords to make straps or handles on a knitted bag or to make knitted jewelry. There’s also an attached or applied i-cord technique that you can use to create a beautiful round edge to your knitting.
How to knit an i-cord
If you’re knitting the Starboard hat, this tutorial starts after you have finished your crown decreases and the i-cord set-up round. At this point, you should have four stitches remaining on one double pointed needle.
To knit an i-cord, you need only two double pointed needles. You are going to knit the stitches, slide them along the needle, and then knit the stitches again. The trick that makes an i-cord work is that you do not ever turn your work. To position the stitches to knit again, you slide them along the double-pointed needle from left to right.
Here’s a break down of the steps to knitting an i-cord:
- Knit all four stitches from one double pointed needle onto your second double pointed needle.
- Do not turn your work (this is the most important step!)
- Slide all four stitches to the right end of the needle. The needle holding the stitches now goes in your left hand and the needle that originally held the stitches goes in your right hand.
- Knit the four stitches again.
Repeat steps two through four until your i-cord measures 2″. This process is also shown in the pictures below. Just like knitting any row of knitting, you knit the stitches from the left to the right needle. By sliding the stitches from the left end to the right end of the needle, they are positioned to knit again.

Finishing your i-cord
There are two ways you can finish your i-cord. One way is to bind off your stitches and then weave in your ends. The second way is to cut your yarn, leaving a 6″ tail to weave through the i-cord stitches. This tutorial shows that second method as that matches the Starboard Hat pattern directions and the method I use.
Once you have knit the 2″ i-cord of your Starboard Hat, cut your yarn leaving at least a 6″ tail. Weave the tail through the remaining stitches, removing them from the needle (this is shown in the first of the three pictures below, on the left).


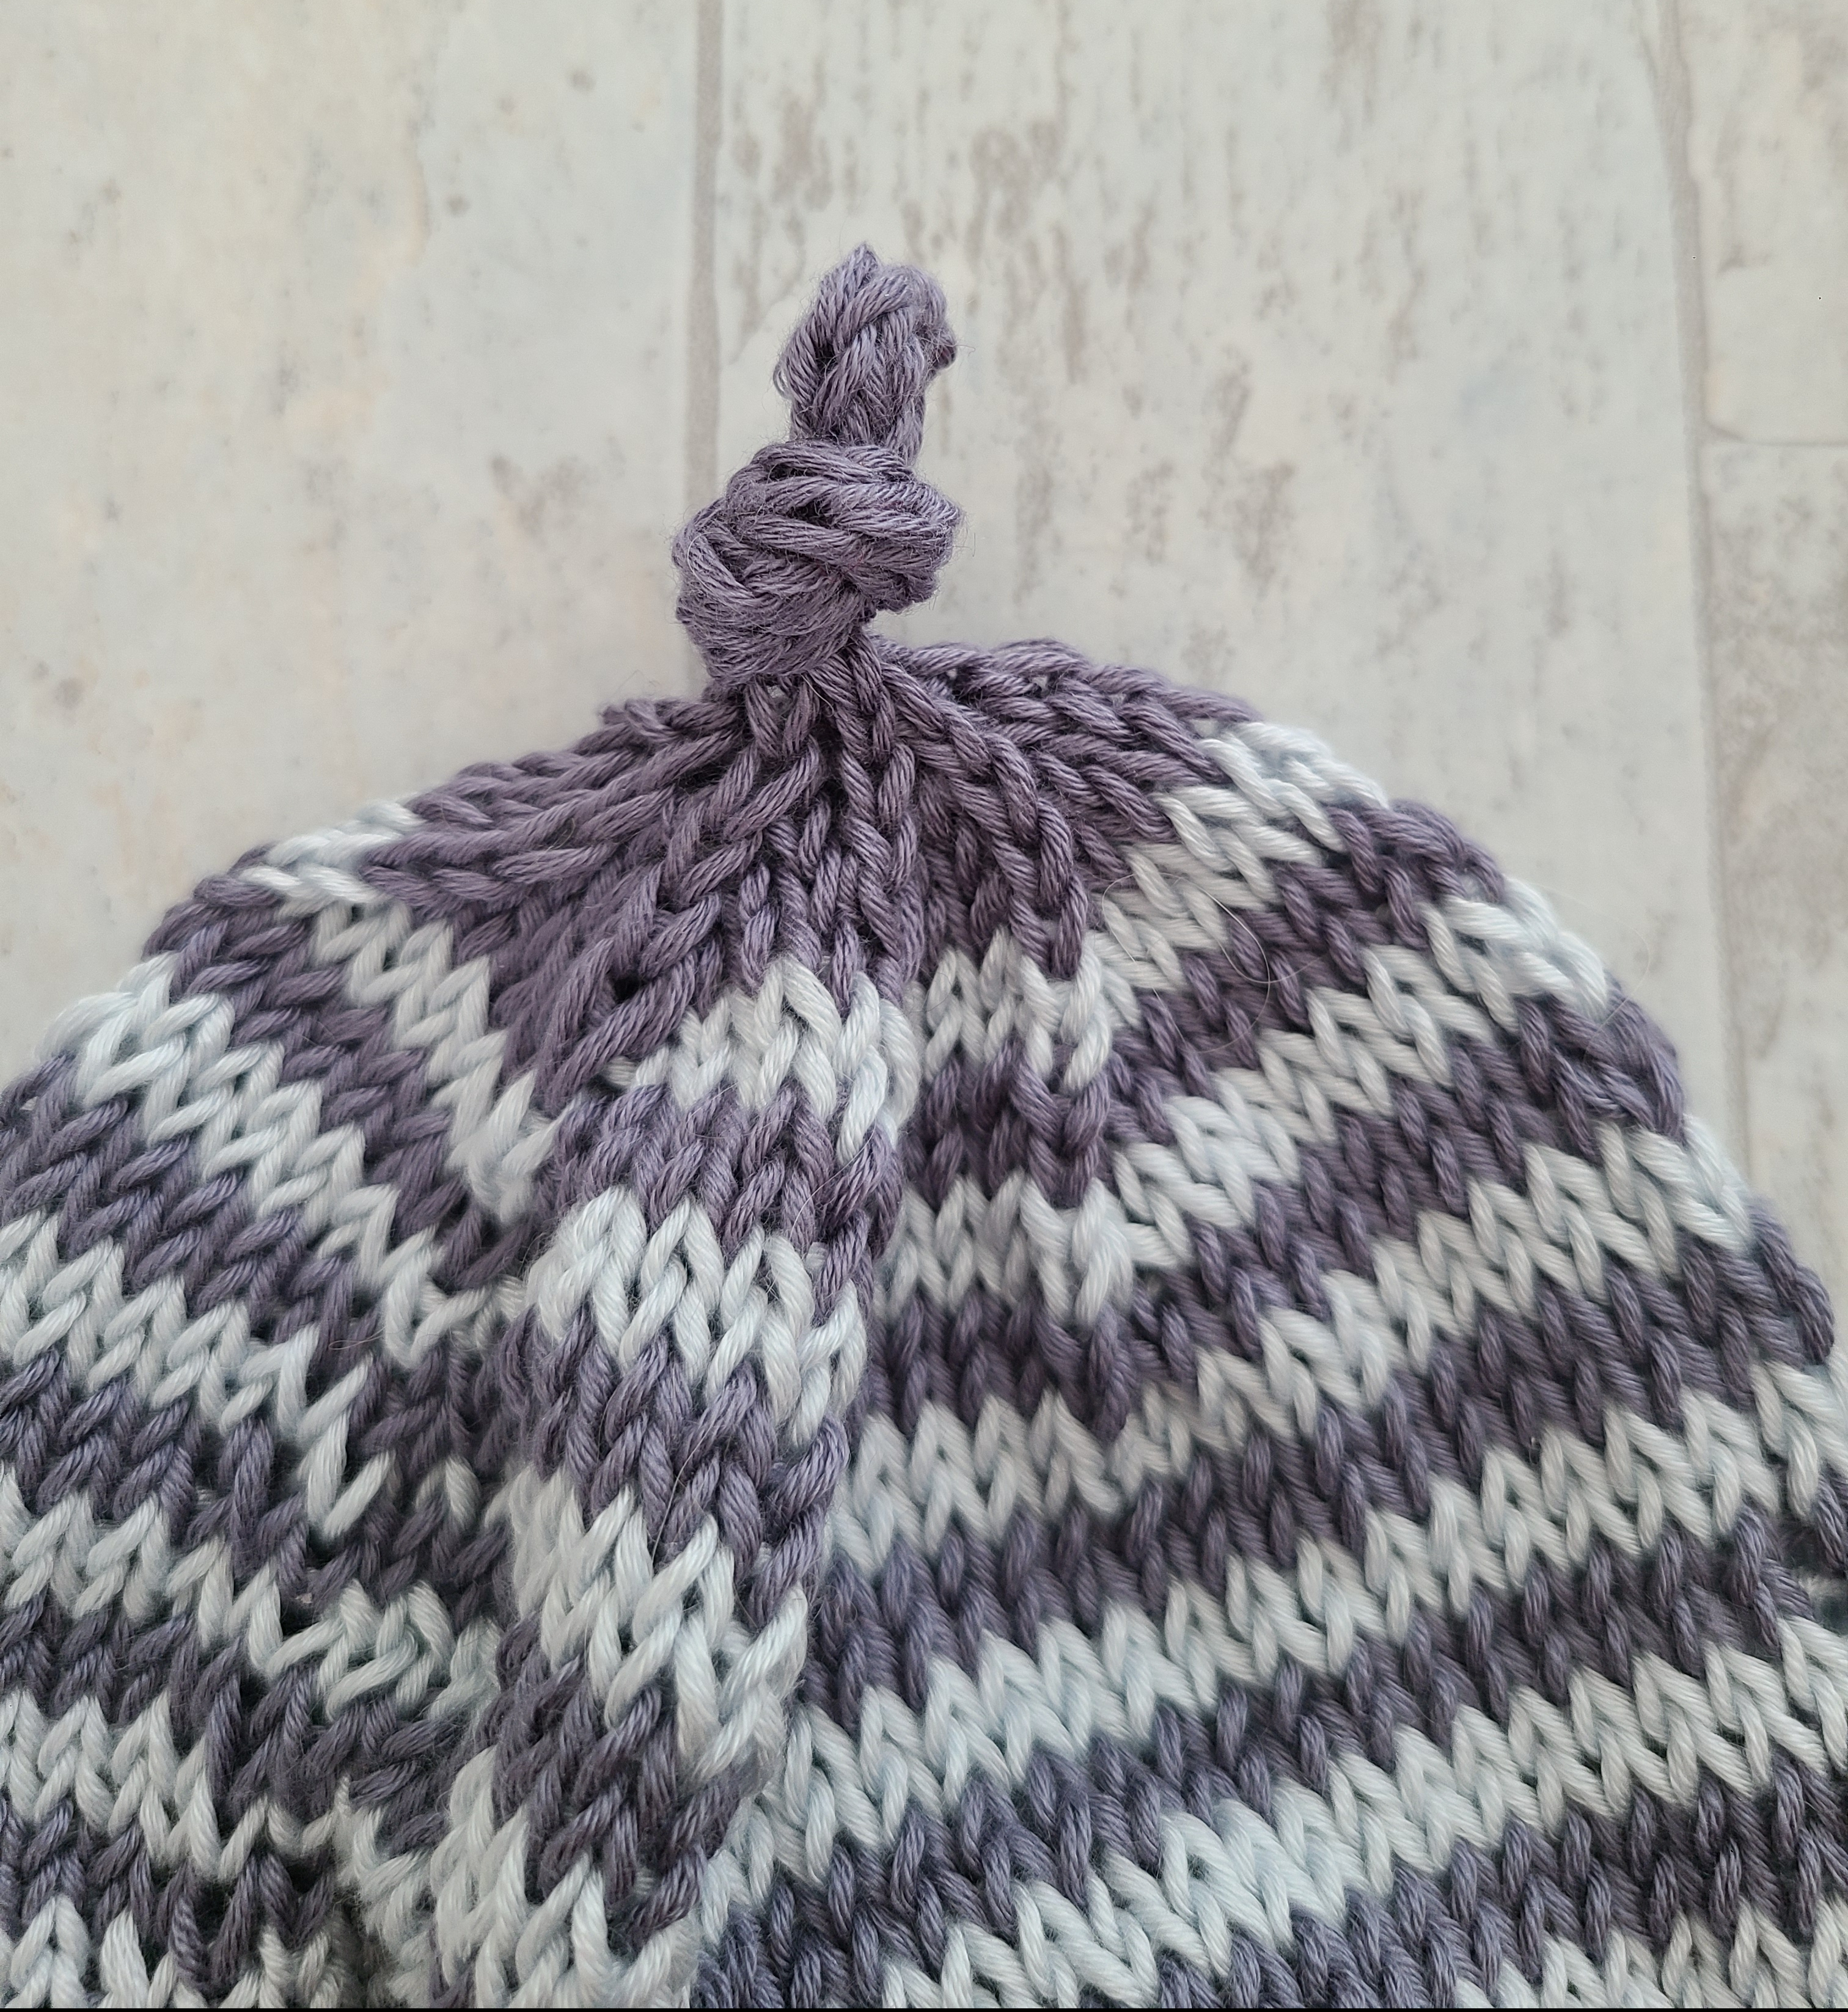
Pull the yarn taut to close the top of the i-cord and hide the tail inside the i-cord so it is hanging inside the crown of the hat (this is shown in the middle picture above). I can usually thread the yarn on the yarn needle down the center of the i-cord fairly easily. This completely hides the yarn tail (this is shown in the third picture, on the right above). If this is a new-to-you technique, push your yarn needle slowly and gently through the top of the i-cord straight down into the crown of that hat.
Before weaving in the ends of your yarn, tie the knot in your i-cord. I recommend doing this before weaving in your ends because I find it easier to manipulate the i-cord if I want to undo and redo the knot so it’s positioned just right. I usually knot my i-cords very close to the crown of the hat, but you can leave a little space between the knot and the crown of your hat.

Loop versus Knot
If you’re using this tutorial to help knit the Dorrance Street Hat or you’d like to put a loop on top of your Starboard Hat instead of a knot, knit a 3″ i-cord. After you knit your 3″ i-cord, break your yarn leaving a slightly longer tail (7 or 8 inches instead of 6 inches). This will give you a little extra yarn to secure your loop.
After you break your yarn, weave the tail through the stitches, removing them from the knitting needle, and pull the top of the i-cord closed. Instead of weaving the tail into the crown of the hat through the i-cord as described above in the knot instructions, use the tail to help create a loop out of the i-cord:
- With the yarn tail threaded on your needle, pull the tail through the crown of the hat. You should insert your needle very close to the center of the crown. (Shown in the picture on the left below)
- Use the yarn tail to knot the loop into place. You can use the yarn to sew a couple of stitches to secure the loop in place.
- Once the loop is secure, weave in the tail of the yarn (show in the picture on the right below).


After you’ve finished your i-cord, finish your hat by weaving in any loose yarn ends. Then block or wash your hat as needed and it’s ready to be worn and enjoyed!
Hopefully, this tutorial helps supplement the Starboard and Dorrance Street hat patterns. I-cords make great tops to hats and once you know how to do one, you could add i-cords to other baby hat patterns.
I think i-cord knots and loops are adorable additions to any baby and toddler hat. If you knit a hat and this tutorial helps you out, please share it with me on Instagram. I’m @knitmckinley Instagram and I use the hashtag #knitmckinley for my projects and patterns.
Happy knitting,
Kara
Leave a Reply