Your cart is currently empty!
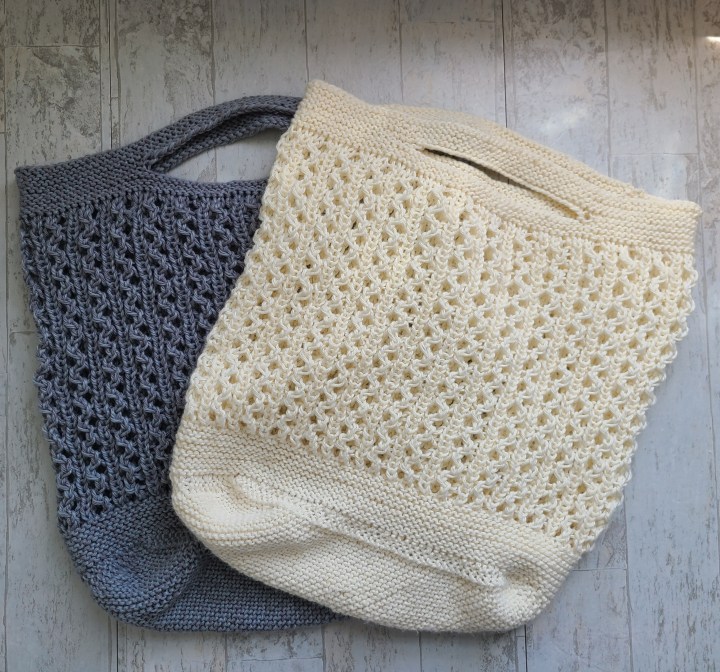
Farmer’s Market Tote

Correction: Initially the CDD was left off the abbreviations list! This is corrected below and in the pdf as of 12 June 2021.
Something about warm weather makes me want to go to a local farmer’s market and load up on fresh veggies, breads, meats, and flowers. You can find farmer’s markets year round now which is wonderful, but there’s something about outdoor markets in warm weather that is just lovely. Over the years, I’ve knit different totes and bags to haul my goodies home in, but hadn’t turned my notes into a pattern.
The timing seemed right to actually write the pattern for my favorite version of this tote. This pattern gives instructions to knit a generously sized tote constructed with a garter stitch diagonal base, lacy stretchy sides, and easy to finish handles. If you use a yarn with enough yardage you will only have to weave in your cast on and bind off tails when you’re finished — and there are no seams to sew.
A note on the yarn: This was the first project I have knit using Lion Brand’s Comfy Cotton. This yarn is a 50% cotton, 50% acrylic yarn and over all I’m happy with the knitting experience. The combination of acrylic and cotton was softer on my hand than 100% cotton yarns I’ve worked with. The ball is also large enough that I could knit an entire tote out of a single ball. All in all, this is yarn I would use again for another project and recommend if you’re knitting your own Farmer’s Market Tote. If you prefer a 100% cotton yarn, try out Lily Sugar’n Cream yarns. Sugar’n Cream is a great workhorse cotton yarn that will work really well for this pattern.

About the Tote
Construction: This knit tote features a solid base and stretchy lace sides. You begin with a diagonal base knit back and forth before switching to knitting in the round to make the sides, top, and handles. This means minimal ends to weave in and no seams to sew.
Skill Level and Size
- Skill level: Intermediate
- Skills needed: Knitting and purling in the round, kfb and m1 increases, k2tog and ssk decreases, picking up stitches, yarn overs.
- Size: Important: the following measurements are for the bag laying flat or unstretched. This knit bag will stretch significantly when used.
- Height: 15”
- Length: 12”
- Width: 5”
- Gauge: 24 stitches and 48 rows per inch in garter stitch on US 5 (3.75 mm)
Materials
- US 5 (3.75 mm) 16” circular needle.
- US 9 (5.5 mm) 20” circular needle.
- 375 yards DK weight cotton or cotton-blend yarn. Samples shown use Lion Brand Comfy Cotton (50% cotton, 50% acrylic), 392 yards/ 200 g in the Whipped Cream and Silver Lining.
- One stitch marker. Optional: 3 contrasting stitch markers.
- Yarn needle.
- Scissors.
Abbreviations
- BO: Bind off
- CDD: Center double decrease
- CO: Cast on
- k: knit
- k2tog: knit two together
- kfb: knit front and back
- m1: make one stitch
- p: purl
- ssk: slip, slip, knit
- sts: stitches
- rnd(s): round(s)
- yo: yarn over
Pattern
If you want to grab the pattern and cast-on, use the button at the top of the page to download the pdf. If you’d like a visual walk-through of the pattern, keep reading for a picture tutorial. Complete instructions are in both the pdf and this tutorial.
The tutorial provides more detail on how to complete each step. You’ll find a picture and short explanation describing each step of the pattern. The exact instructions are bulleted (these instructions match the pdf instructions). There is also one short video clip showing how I pick up and knit stitches around the base of the bag to begin knitting in the round.
Cast-on and Knit the Base

The first section of the Farmer’s Market Tote is a triangle. You cast-on three stitches and increase along both sides of your knitting. In the picture above, the solid orange arrow show the direction of your knitting. You will knit increases along both sites of your knitting, shown by the orange dotted arrows.
- CO 3 stitches with smaller needles (US 5, 375mm).
- Row 1: kfb, k1, kfb.
- Row 2: knit all sts.
- Place a stitch marker to mark the beginning of row 3 and continue.
- Row 3: k2, m1, knit to end of row.
- Row 4: k2, m1, knit to end of row.
- Repeat rows 3-4 nineteen times (45 stitches)

Once the initial triangle is knit, you’ll continue to knit on the diagonal forming a rectangle by increasing stitches along the right side of your work (orange dashed line on the right in the picture above) and decreasing along the left side of your work (green dashed line on the left in the picture above).
Continue knitting as follows:
- Row 5: k2, m1, knit to end of row.
- Row 6: k2, ssk, knit to end of row.
- Repeat rows 5-6 until long edge of piece measures 12” (approximately 25 two-row repeats)

To finish knitting the base of the bag, you decrease along both edges of your knitting (shown using green dotted arrows in the picture above). You’re still knitting diagonally (shown by the orange solid arrow in the picture above) and these decrease brings the two edges of your knitting together to form a triangle shape. This second triangle shape completes the rectangular shape of the bag base.
If you’re new to using a CDD (center double decrease), I provide step by step instructions in this post on the Anchored Hat.
- Row 7: k2, ssk, knit to end of row.
- Row 8: k2, ssk, knit to end of row.
- Repeat rows 7-8 nineteen times (7 stitches remain).
- Row 9: k2, CDD, k2.
- Row 10: knit all sts.
- Row 11: k1, CDD, k1.
- Row 12: CDD (1 stitch remaining). Do not turn your work.
Next you’ll pick up stitches around the rectangular base to begin knitting in the round.
The video above shows how I pick up and knit stitches in between garter ridges. I’m a left-handed continental knitter so the yarn is to the left, but you can see the needle movements that I use to pick up and then knit the stitches. I pick up the yarn in between each garter ridge with the left needle and knit that as I would any other knit stitch. Picking up one stitch in between each garter ridge all around the base should yield 134 new stitches.
From the pattern pdf:
- The stitch remaining after completing row 12 becomes the first stitch of the round you’ll knit after picking up stitches. With that stitch on the right needle, pick up and knit 134 stitches around the knit base beginning with the short edge to the left of the stitch on your needle. (135 stitches total).
To ensure your stitches are picked up evenly around the bag, pick up and knit 21 stitches along the first short edge, 46 along the first long edge, 21 along the second short edge, and then 46 along the second long edge. To help keep track of your stitch count, use contrasting stitch markers to mark your progress.
Knit the Sides of the Tote
After you have picked up and knit all your stitches, you will have 135 stitches on your circular needle. You’ll begin knitting garter stitch in the round (shown in the picture below).

- Begin working in the round:
- Rnd 1: purl all sts.
- Rnd 2: knit all sts.
- Repeat rounds 1 and 2 seven more times (16 rounds worked).

Once you’ve completed the garter stitch rounds, switch to US 9 needles to knit the lacy sides of the bag. As shown in the picture above, you switch to the larger needles by knitting from the smaller needle on to the larger needle and continue working in the round.
- Switch to larger needles (US 9, 5.5 mm) and continue:
- Rnd 3: *k1, p1, k2, p1; repeat from * to end of rnd.
- Rnd 4: *k1, p1, k2tog, yo, p1, repeat from * to end of rnd.
- Rnd 5: *k1, p1, k2, p1; repeat from * to end of rnd.
- Rnd 6: *k1, p1, yo, ssk, p1; repeat from * to end of rnd.
- Repeat rnds 3-6 eleven more times (12 repeats).
- Repeat rnd 3 once more bag measures approximately 13 1/2″ from stitches picked up along base).

Top of Bag & Handles
- Switch back to the smaller needles (US 5, 3.75 mm) and continue in garter stitch:
- Rnd 7: knit all sts.
- Rnd 8: purl all sts.
- Repeat ends 7-8 twice more (three repeats completed).
Next knit the handles and finish the bag.

In round 9, bind off stitches. 
In round 10, cast on stitches. 
At the end of round ten, the tote has 135 stitches again and two holes that become the handles.


The tote’s handles are created over two rounds. In the first round (round 9), you bind off stitches. In the second round (round 10), you cast on stitches. Pictured above, from right to left, is how rounds 9 and 10 should look as they are completed. At the end of round 10, there are 135 stitches on the needles.
I used the standard bind off and left handed knitted cast on. You can use whatever bind off and cast on methods you are comfortable with; however, I would avoid using a super stretchy bind off or cast on. This is to avoid the handles stretching out of shape.
- Rnd 9: k30, BO 30, 37, BO 30, k8.
- Rnd 10: p30, CO30, p37, CO30, p8.
After Round 10, continue knitting garter stitch in rounds 11 – 12 as follows:
- Rnd 11: knit all stitches
- Rnd 12: purl all stitches
- Repeat rnds 11-12 three times (four repeats completed).
BO all stitches. Weave in remaining ends. Block bag.

If you knit a Farmer’s Market Tote and are on Instagram, please share your pictures with me. You can tag me (I’m @KnitMcKinley) or use the hasthag #KnitMcKinley. I really enjoy seeing your projects and hope you enjoy these patterns!
If you like this content and would like to support this blog, please consider sharing it with your friends and subscribing to my email newsletter!
Happy knitting,
Kara
